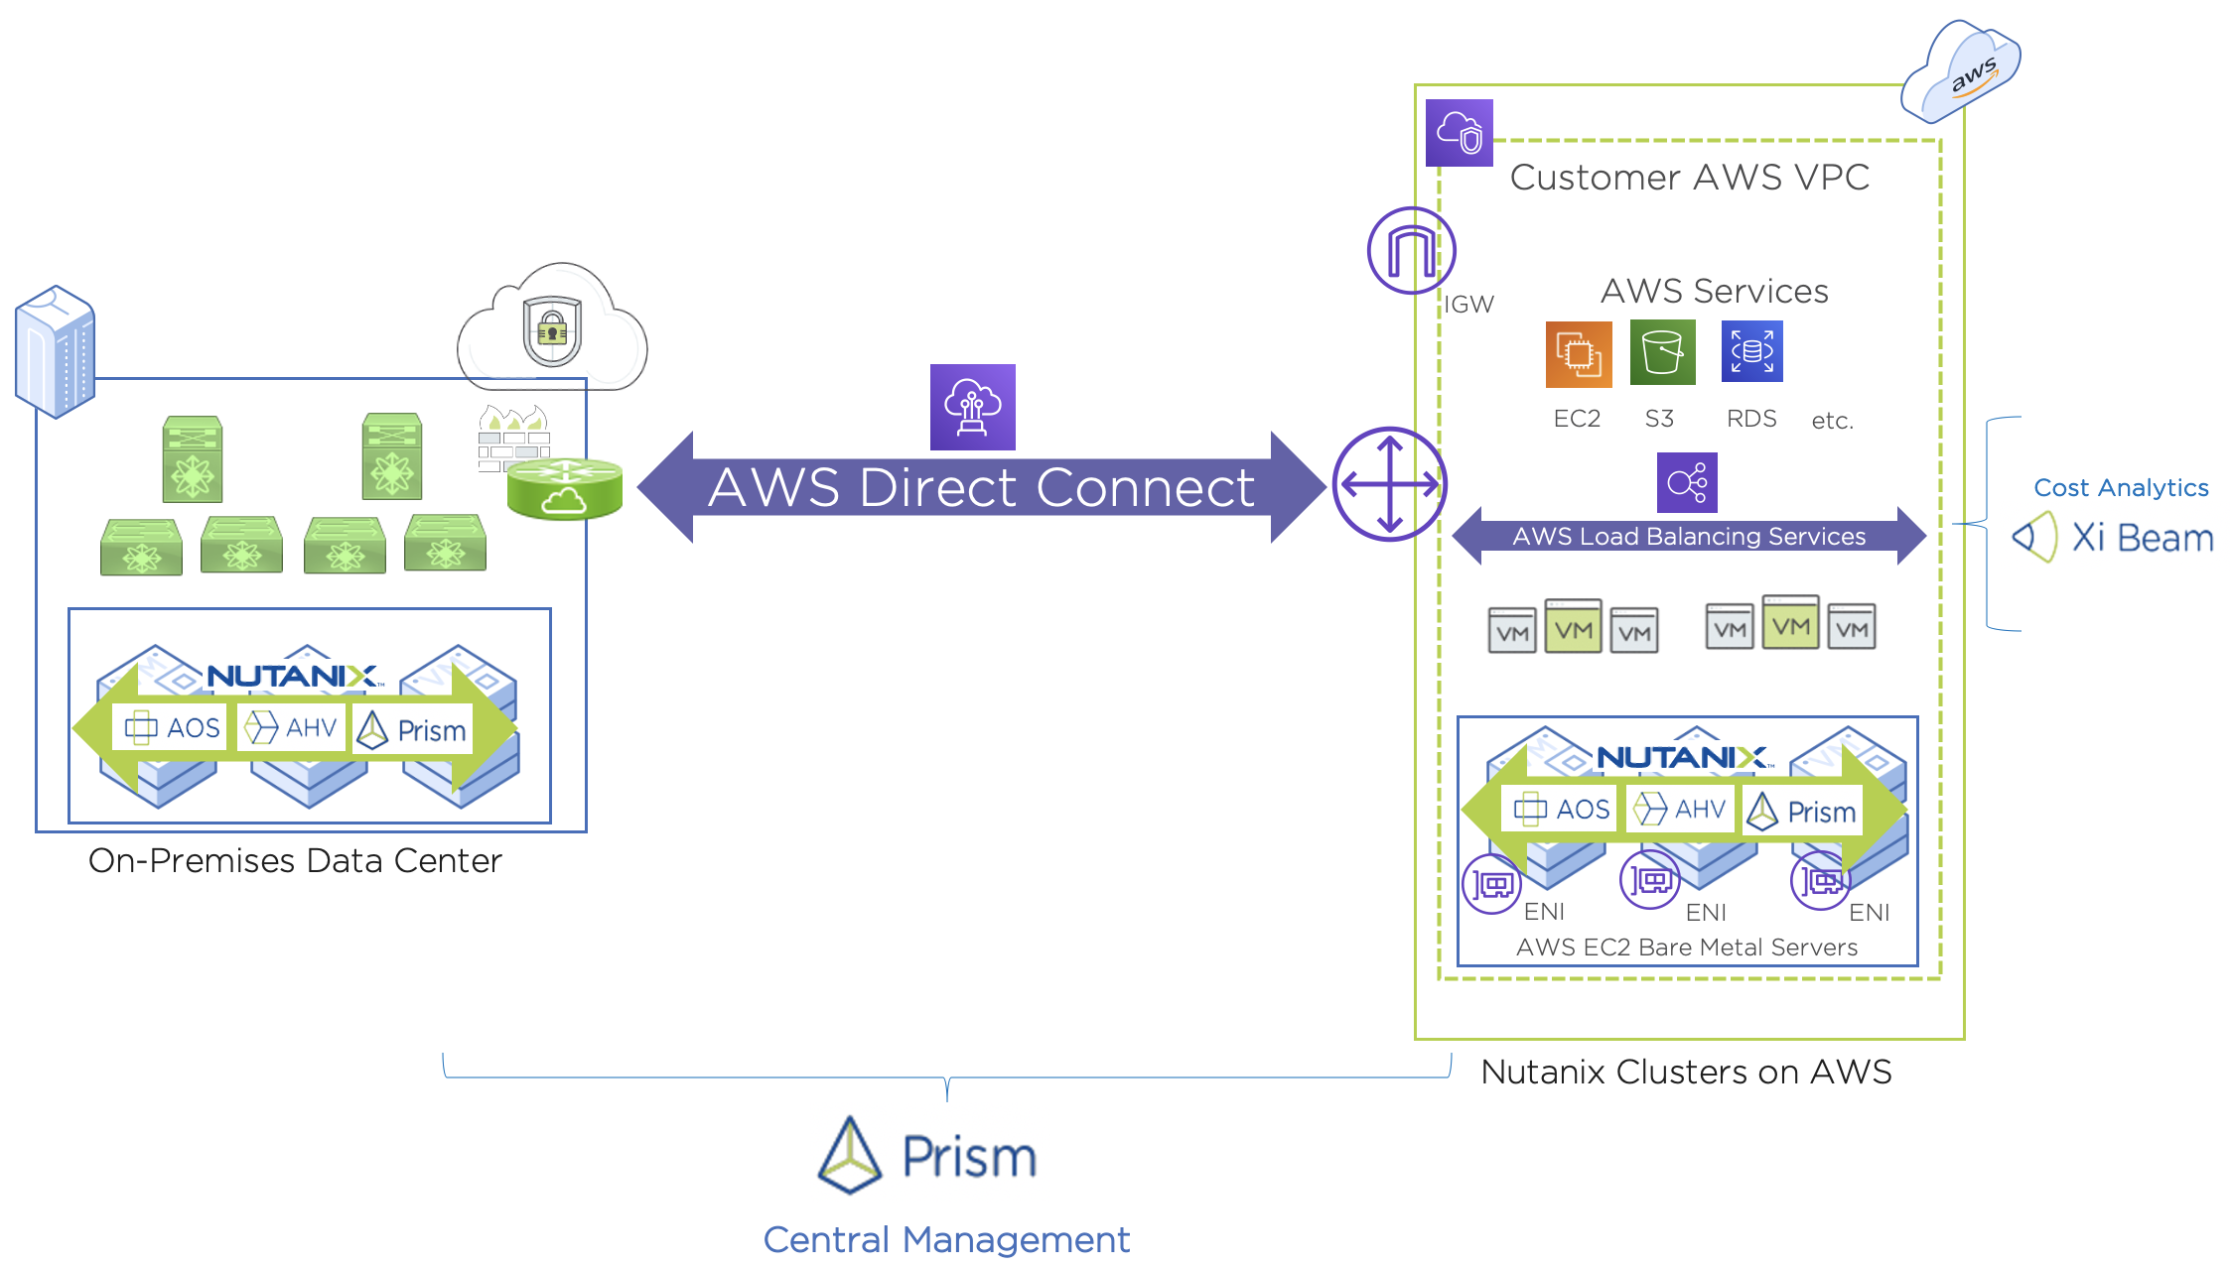
Nutanix Clusters on AWS is available globally across 20 geographic regions and 61 availability zones. See the Nutanix Clusters website for the most up-to-date information. In my prior post, I discussed the availability of Nutanix Clusters on AWS, use cases, and unique advantages. In this post, I walk through how you can easily get started deploying Nutanix Clusters in AWS and leverage for hybrid cloud and central management. For additional information, check out the Nutanix Clusters on AWS Getting Started documentation here. For fun, I also deployed Nutanix Clusters on AWS in Augmented Reality using my Microsoft Hololens 2 augmented reality headset – if interested, you can see the demo here.

Nutanix Clusters on AWS
As discussed in my prior post, the easiest way to get started is to leverage the Nutanix Clusters 1 month free trial. To get started with the free trial, head over to the MyNutanix portal and login or create an account. Note, with Nutanix Clusters on AWS, customers deploy into their existing AWS account, so, charges will still be incurred for the AWS resources utilized in the AWS account (ex: running AWS EC2 bare metal hosts). For the free trial, the Nutanix Clusters software and Nutanix Clusters on AWS portal access will be completely free for the duration of the trial. Once you login, search for the Nutanix Clusters widget as shown below and click Launch.
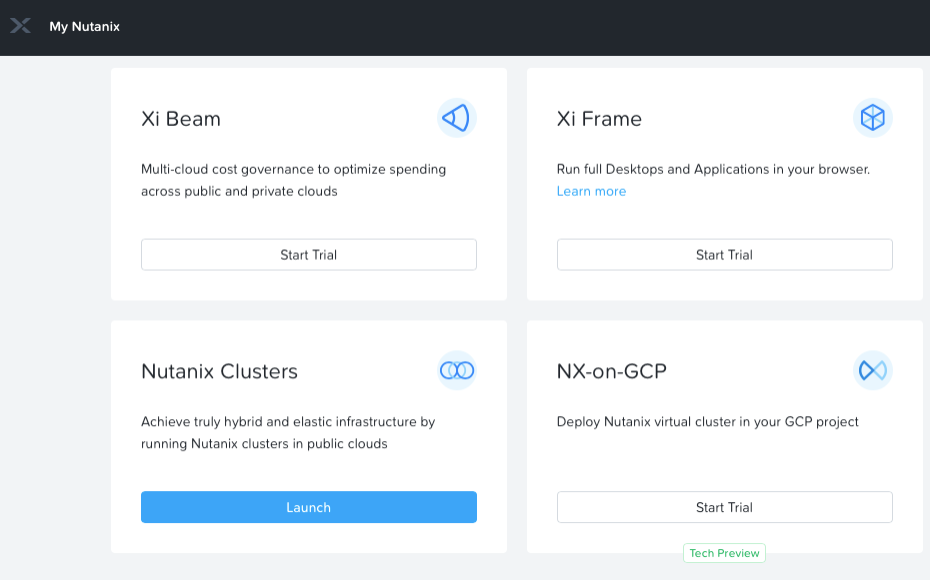
MyNutanix Portal
Once you click Launch and accept the terms, you will have two options – 30 day free trial or purchase.
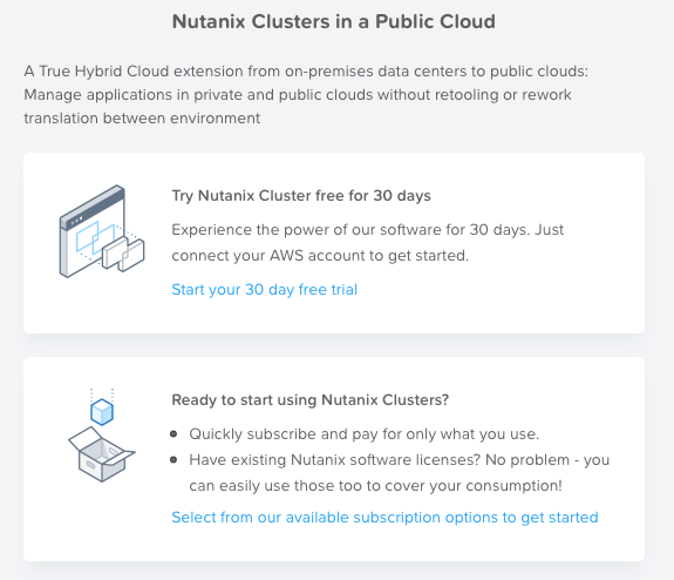
Nutanix Clusters Free Trial
Click the free trial option and get started! At anytime you can navigate to the Billing widget in the MyNutanix portal to see how many days are left in the free trial or to upgrade as shown below.
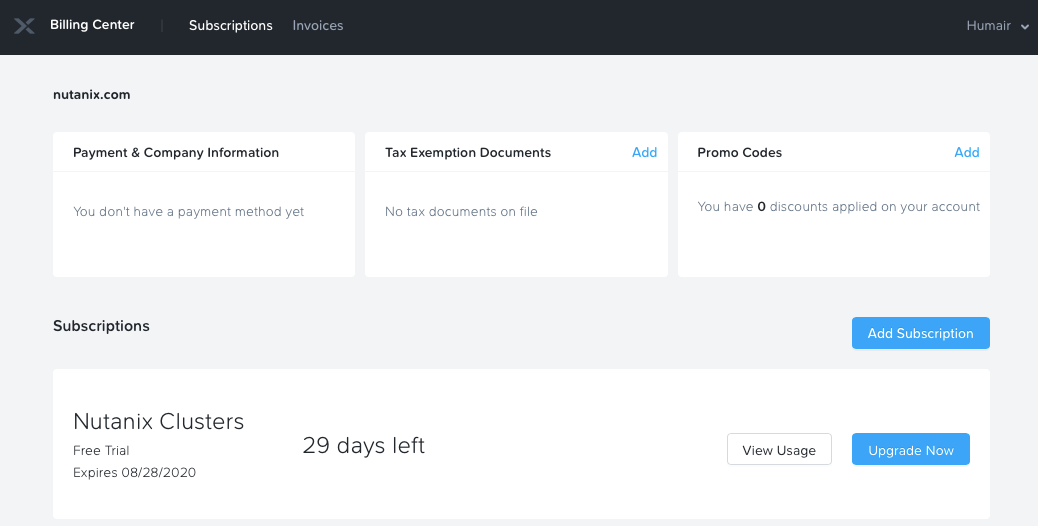
Billing Widget in MyNutanix Portal
Once you start the free trial, you’ll be directed to the Nutanix Clusters on AWS portal. You can see below a wizard steps you through three easy steps to get going: steps 1, 2, and 3 are laid out for you.
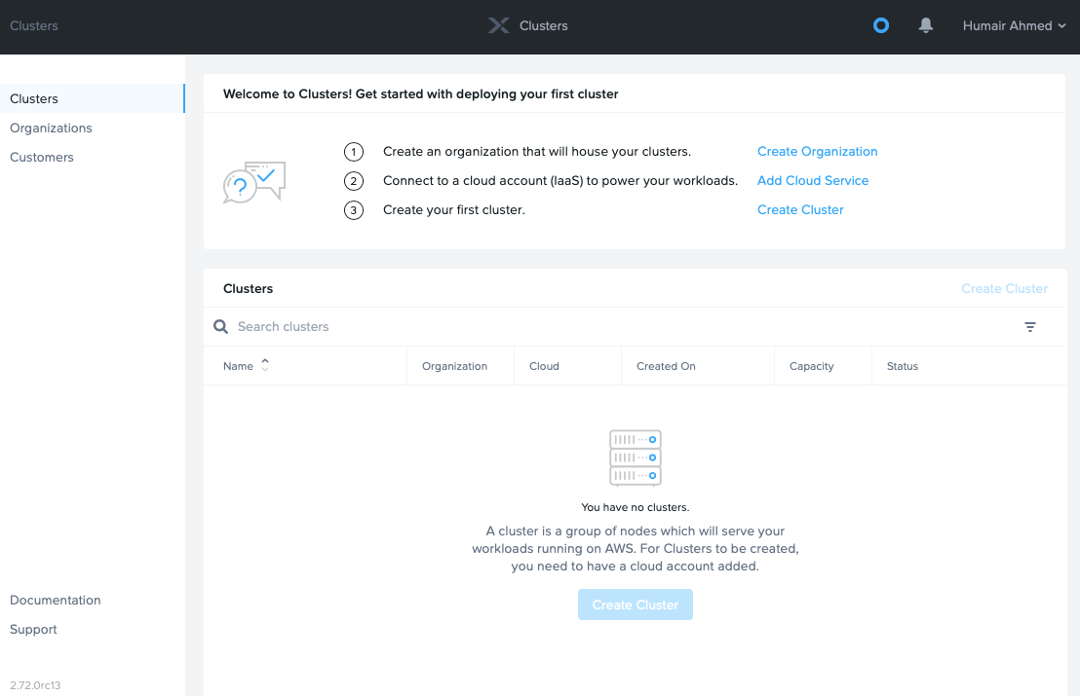
Create an Organization
You can see from above, the first step you have to do is create an Organization. The organization is where Nutanix Clusters reside. You can have multiple organizations and access can be controlled by Role Based Access Control (RBAC).
To get started, click the Create Organization link in the first step and create your organization.
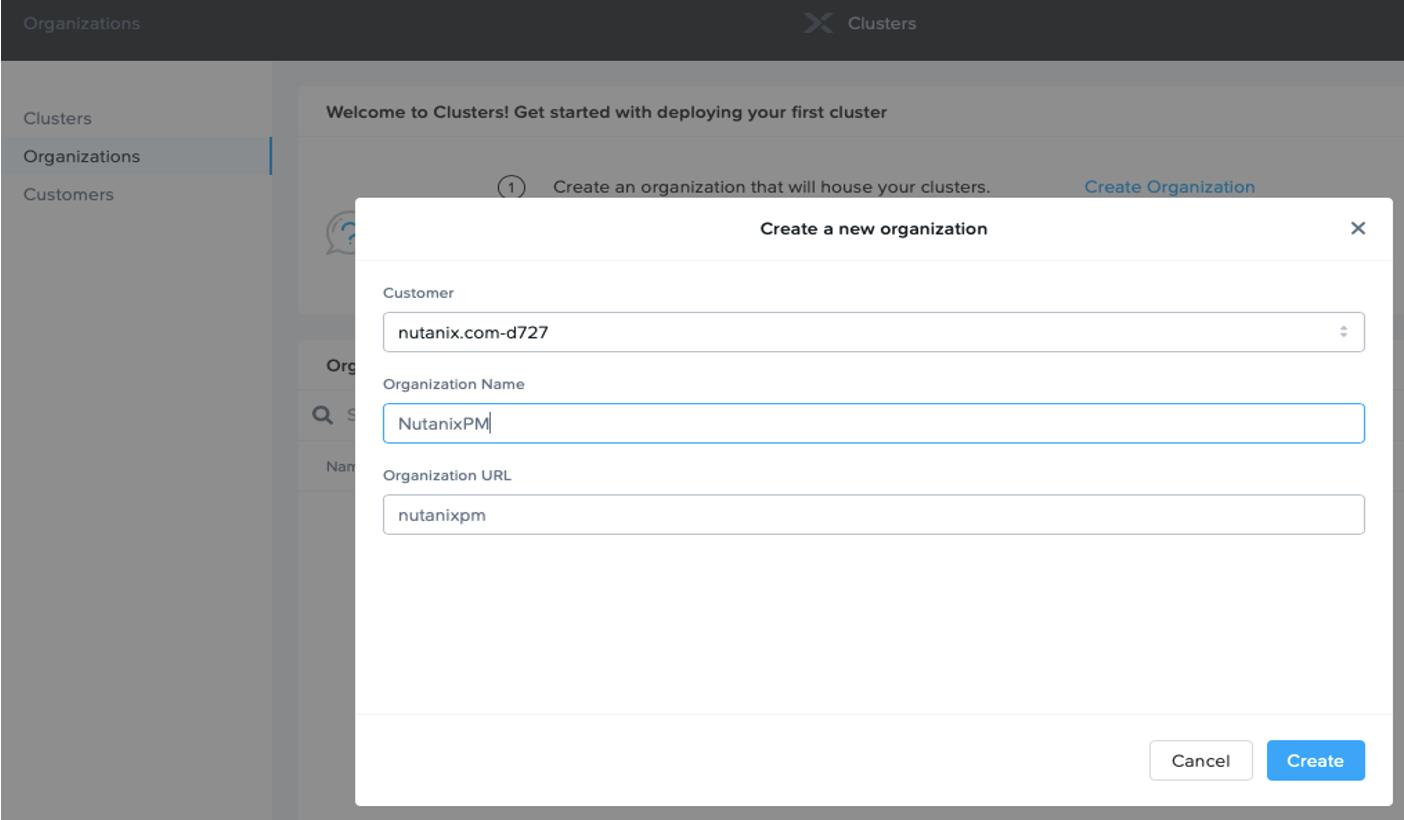
Configuration of Organization
Once the step is complete, it is automatically crossed off the list of tasks. You can see the next task is to connect a cloud account which can be initiated be clicking the Add Cloud Service link in step 2 as shown below.
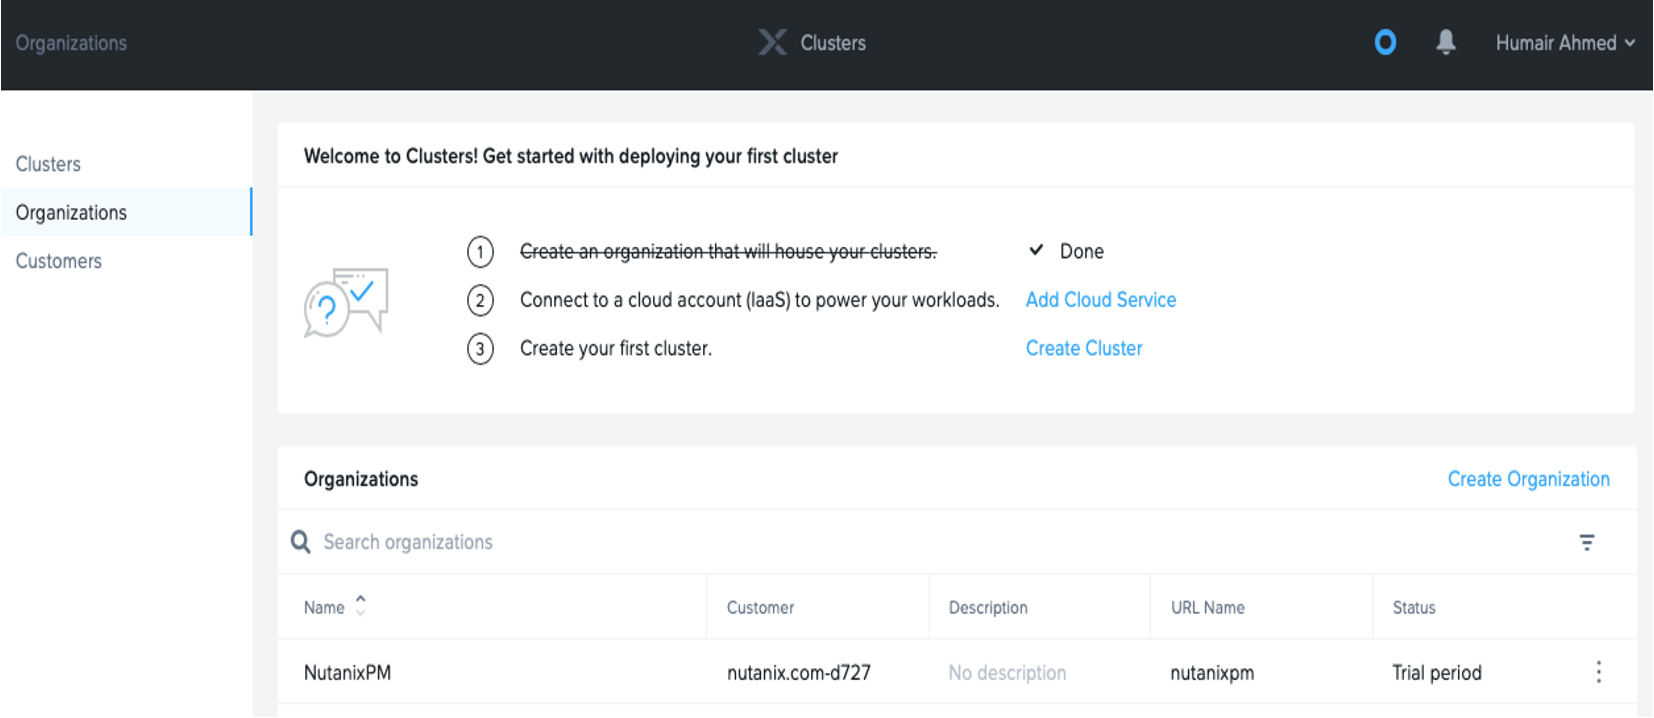
Step 2 – Connect a cloud account
Upon Nutanix Clusters initial availability, AWS is the first cloud provider supported, so I select AWS below. Here you would also enter your AWS Account ID and then click the Prepare account with AWS CloudFormation link to have the Nutanix CloudFormation template executed in your AWS account, giving permissions to Nutanix Clusters for certain operations required for deployment. In this step, you also select the regions you would like the ability to deploy in when selecting this cloud account (this can also be updated later).
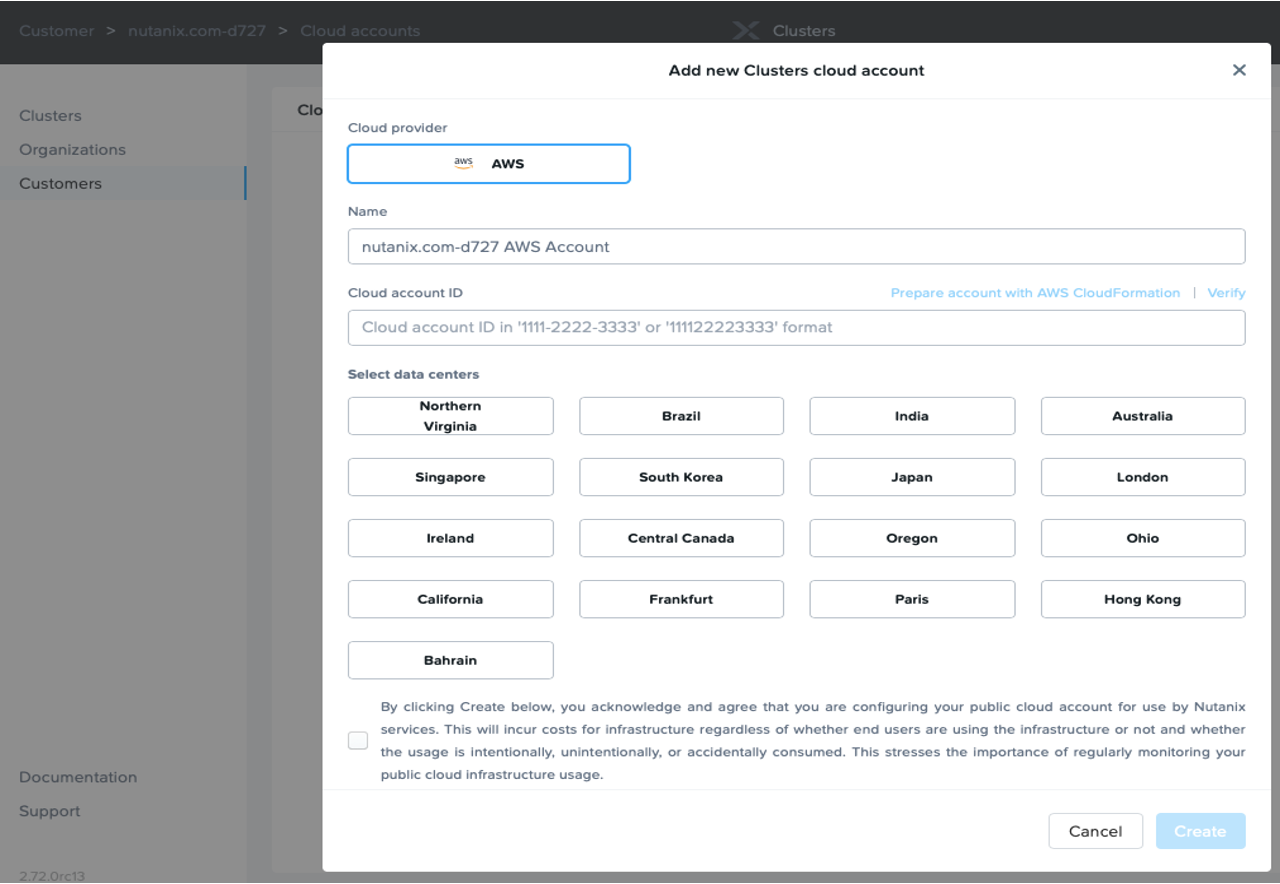
Adding New Cloud Account
Below are some partial screenshots of some of the dialogs you’ll see when clicking the Prepare account with AWS CloudFormation link. The dialogs explain the permission details and prompt you to approve execution.
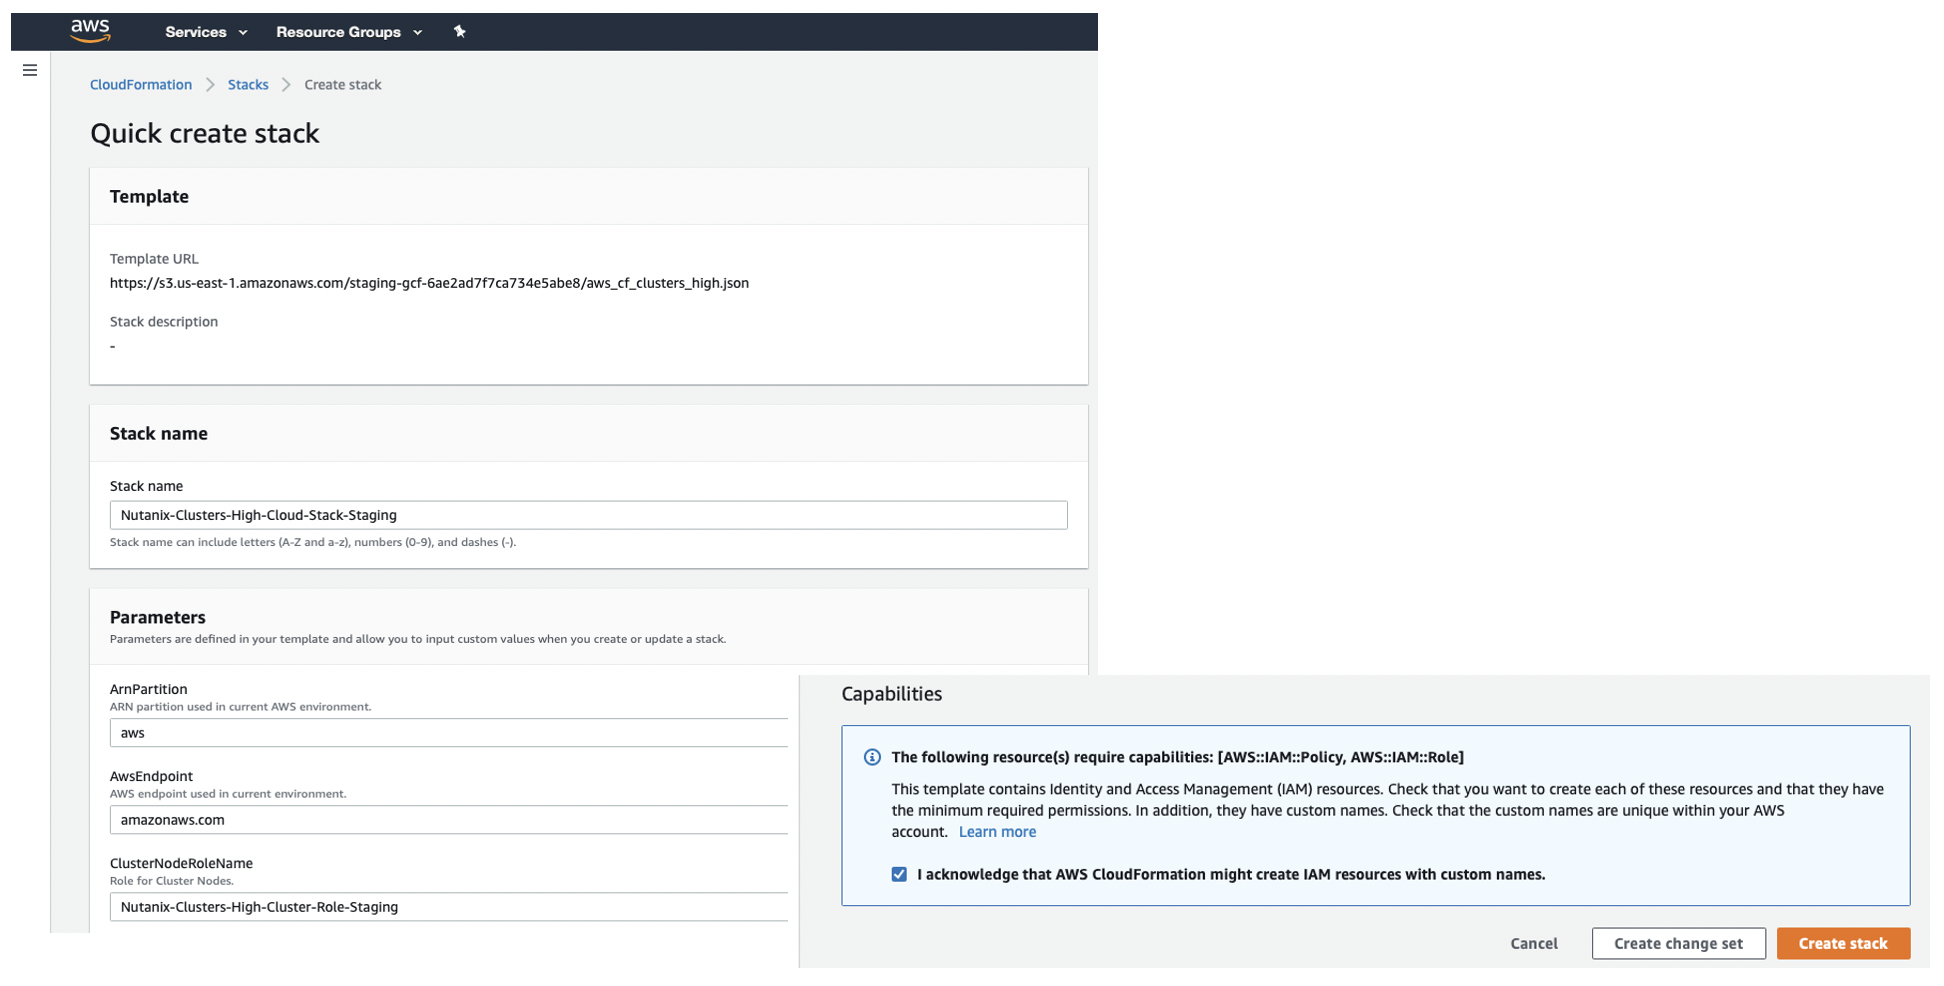
Preparing account with AWS CloudFormation
Note, to run the CloudFormation template and deploy Clusters successfully, the AWS IAM user should have the following AWS permissions as outlined in the Nutanix Clusters on AWS documentation:
- IAMFullAccess: Grants the Nutanix Clusters console access to your AWS account, and grants AWS API access to the AHV instances
- AWSConfigRole: Grants AWS Config permission to get configuration details for supported AWS resources
- AWSCloudFormationFullAccess: Used to create the initial AWS resources required to link your AWS account and create a CloudFormation stack
Once you finish this second step, the cloud account is now configured within the Nutanix Clusters Portal as shown below.

Configured Cloud Account
The second step will automatically be crossed off with the third step remaining which can be initiated by clicking the Create Cluster link in the third step of the wizard/guide shown below.
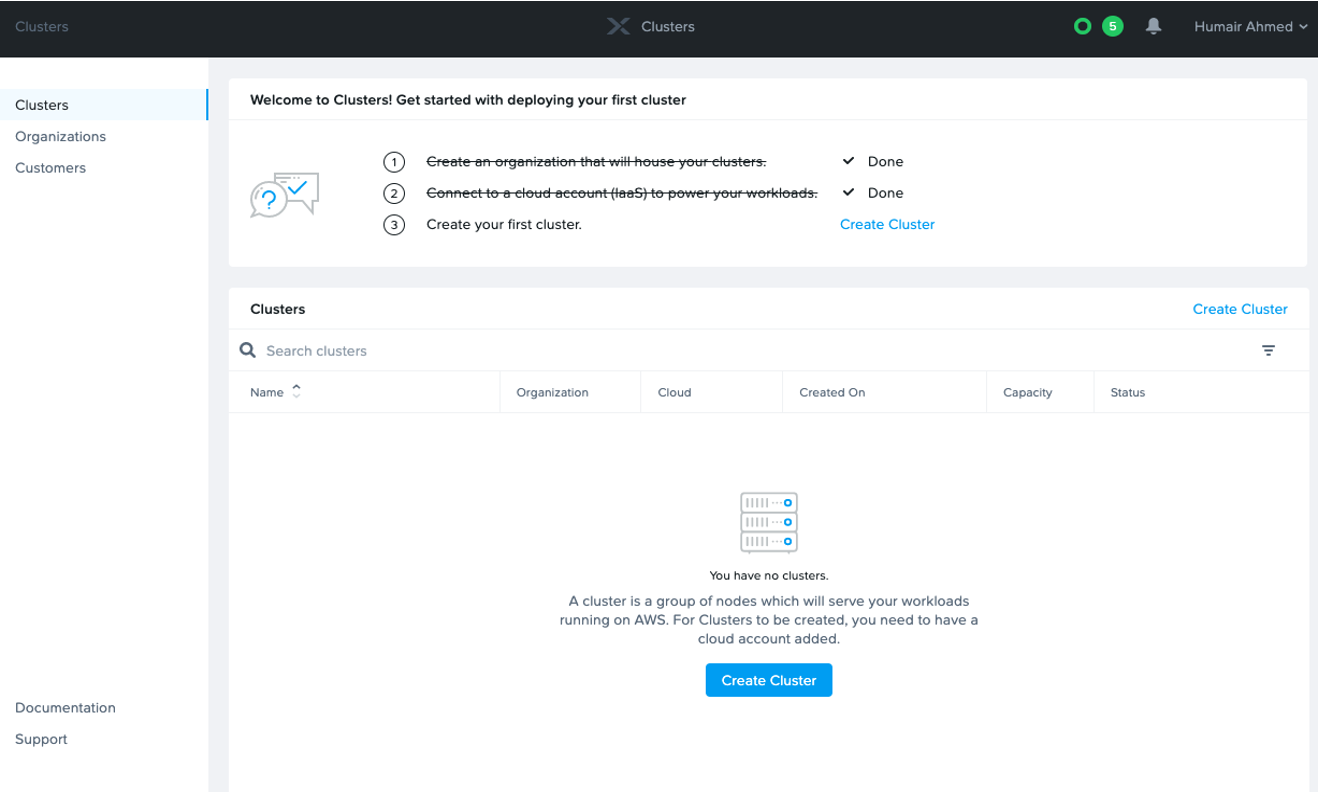
Step 3 – Create Cluster
Below are a few screen grabs of the final Create Cluster step workflow which consists of three sub-steps. The first 2 sub-steps are Region and Network selection and Configuration including selecting the EC2 instance type, replication factor, accessibility/security configuration, etc. Note, there is also an option to schedule the cluster for auto-termination. This is a great feature for customers who know the cluster will only be required for a certain amount of time (ex: dev/test, expected high load/burst, etc.).
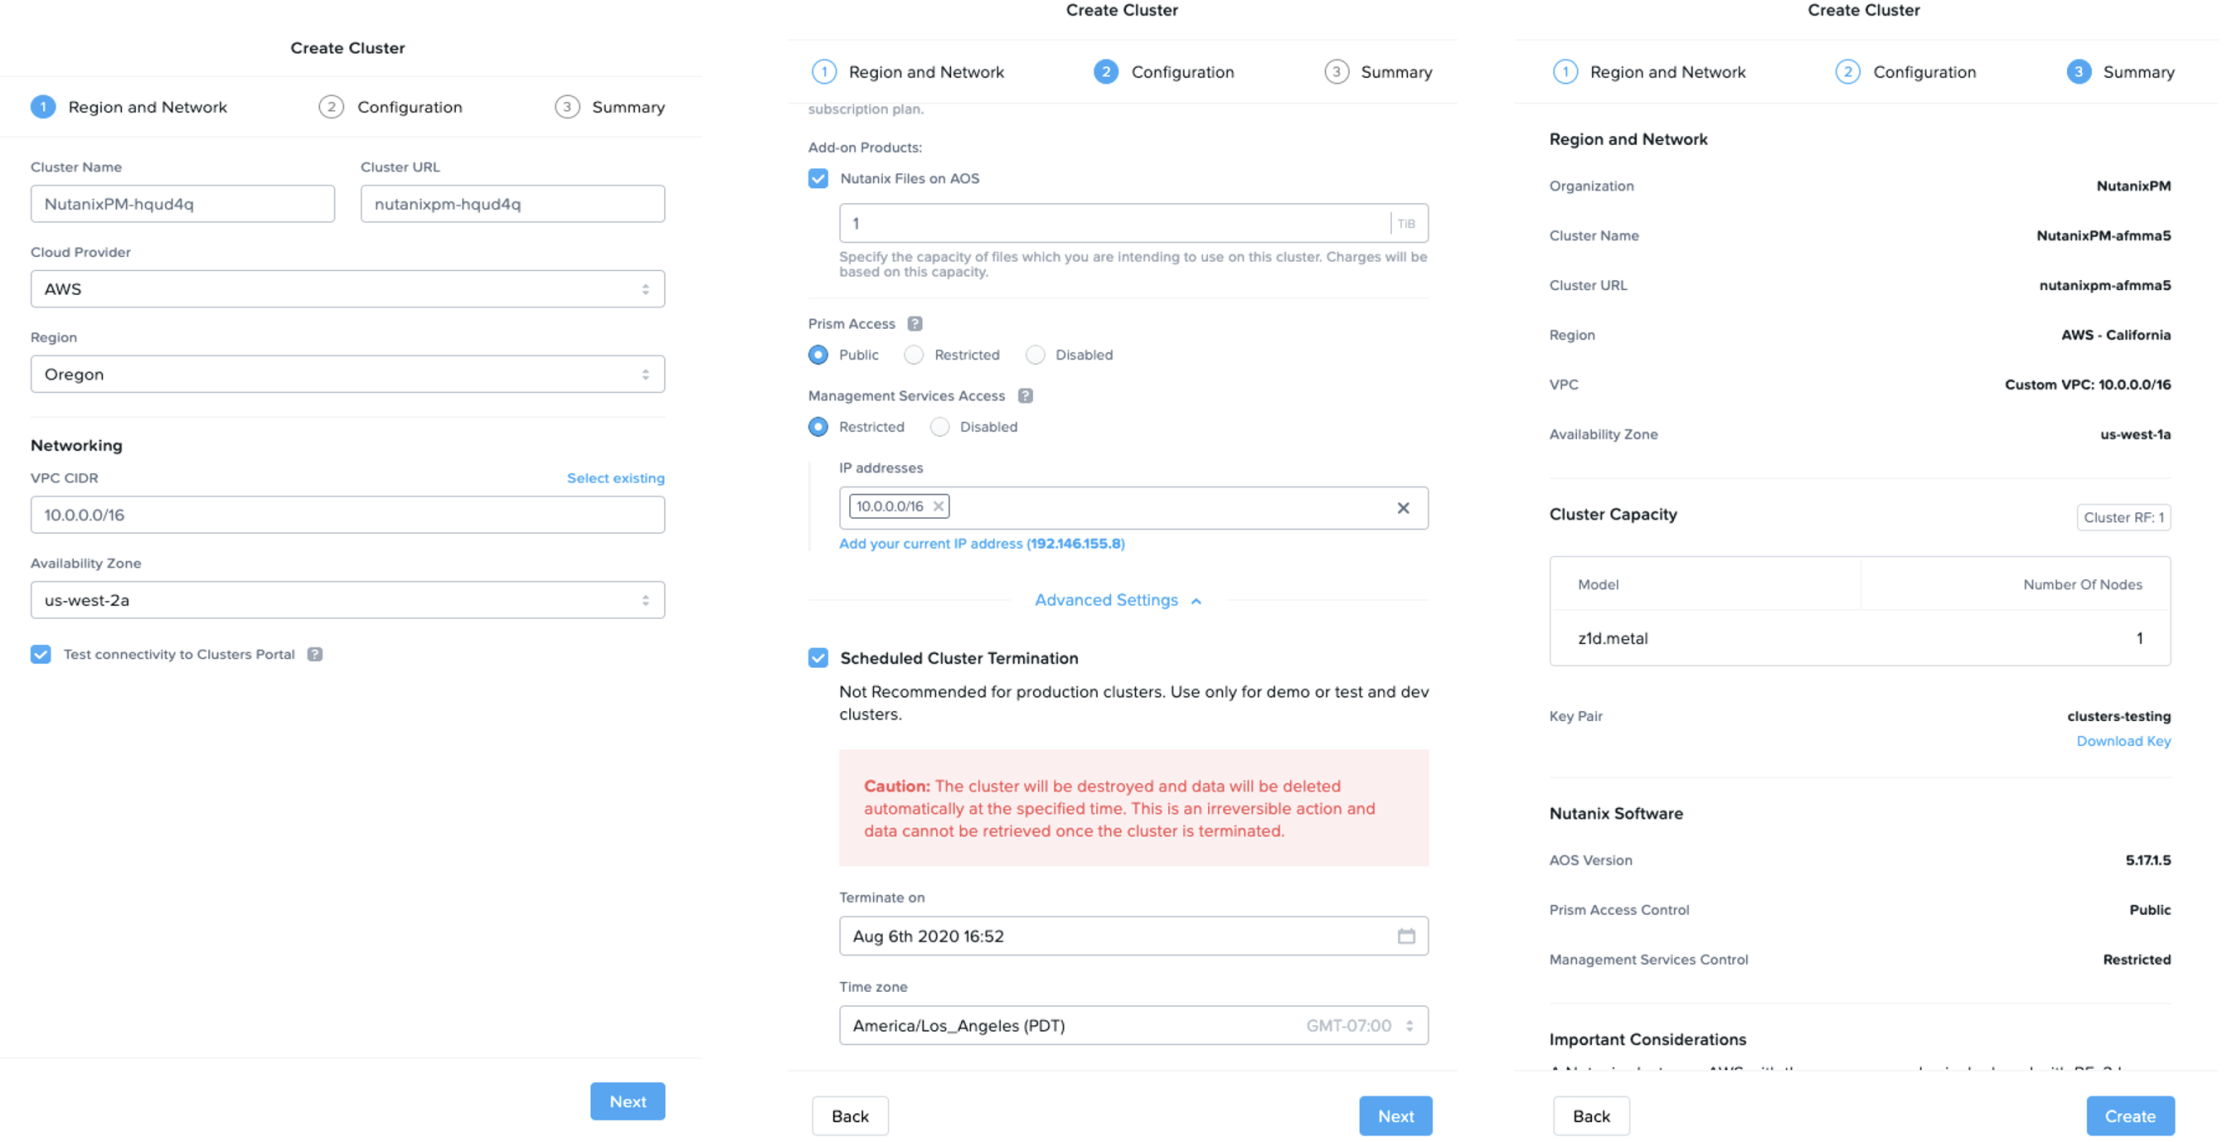
Create Cluster Workflow
The last sub-step of step 2 above has the Create button. Once the user clicks this button, the cluster is created in AWS. Below you can see a cluster has been created and is running in AWS. The cluster creation process can take around ~30-40 minutes depending on configuration details.
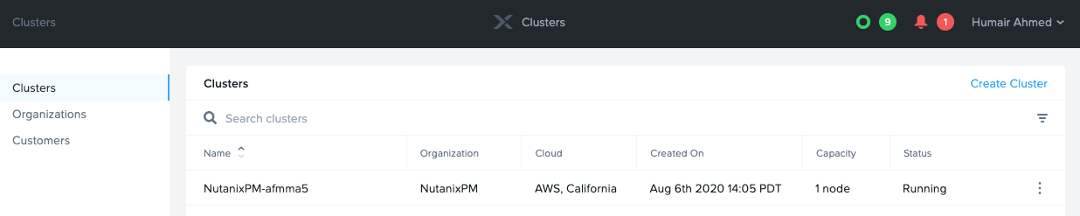
Nutanix Cluster Created and Running
Clicking the cluster name, provides more details and additional capabilities as well as the ability to access the cluster from Nutanix Prism as shown below.
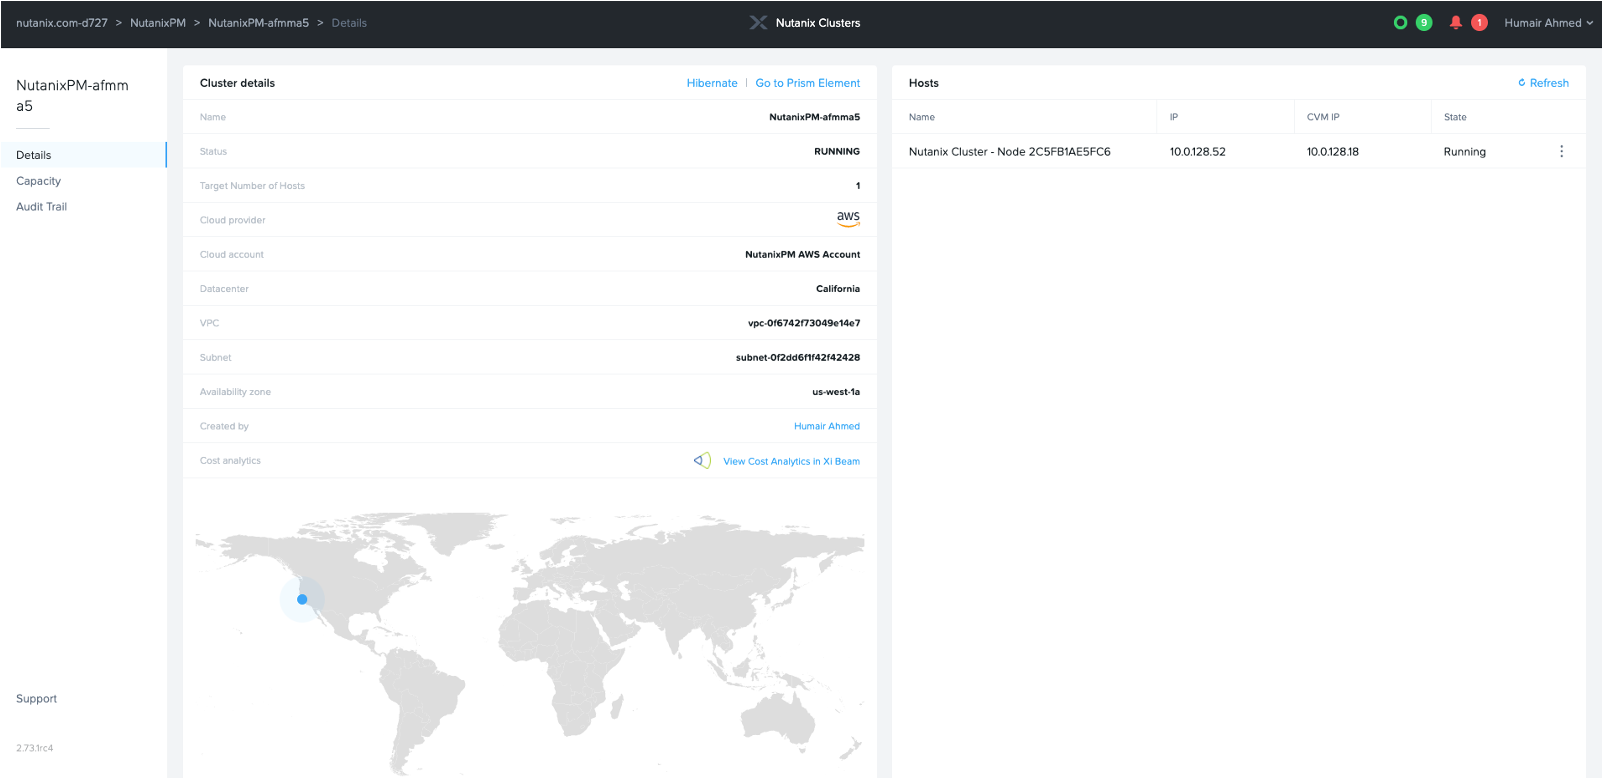
Additional Nutanix Cluster Details
Clicking the Go to Prism Element link opens Prism Element. Note, below, the host type shown in Prism is AWS.z1d.metal. Now, similar to how customers use Nutanix Prism on-premises, you can navigate to Home->VM to start configuring networks and deploying workloads on AHV in the cloud!
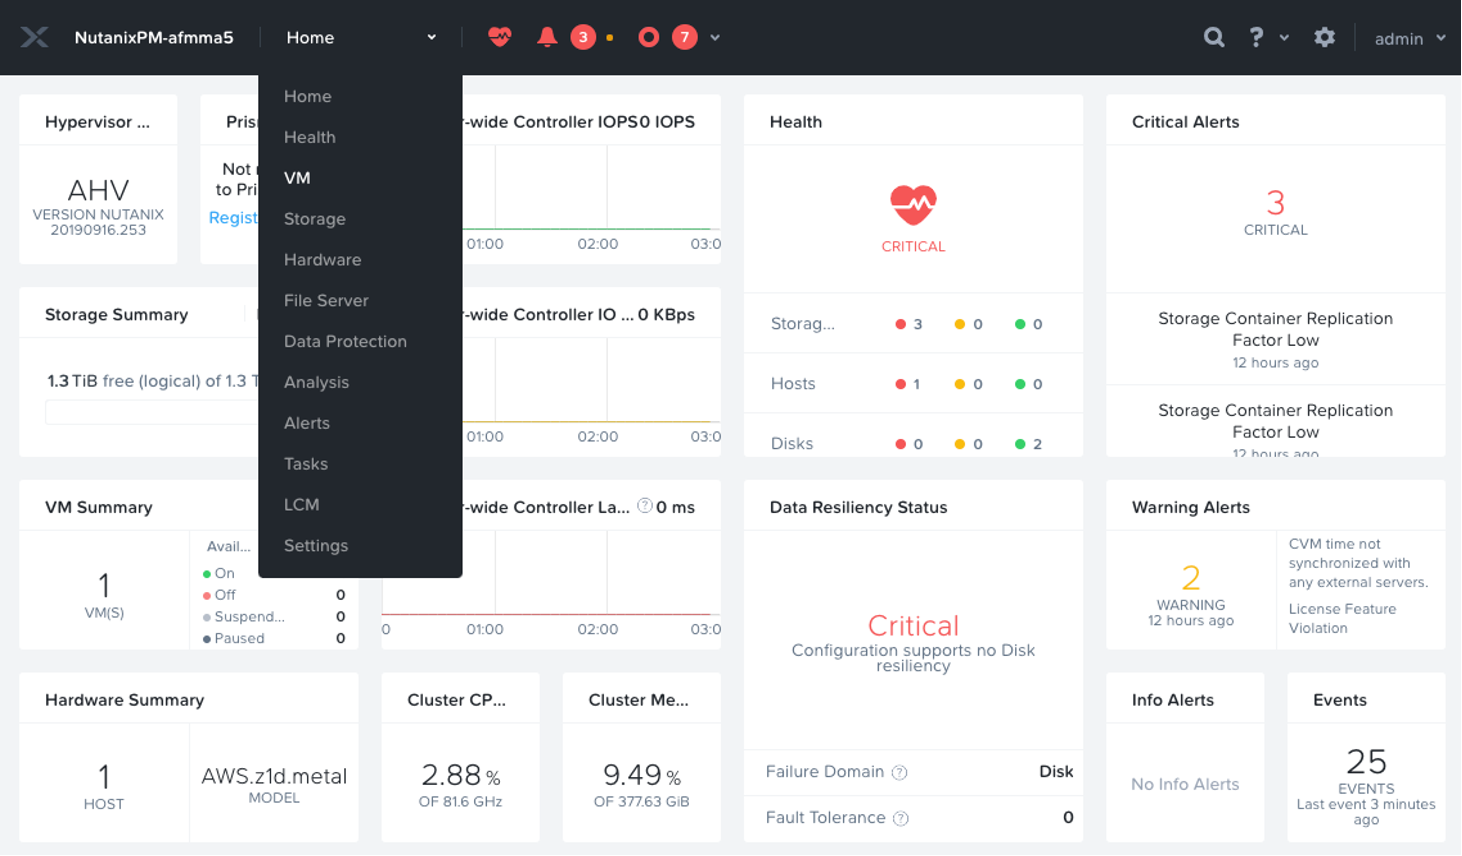
Prism Element – Start Configuring networks and Deploying Workloads on AHV in the Cloud
In my next blog on Nutanix Clusters on AWS, I’ll go into detail on hybrid cloud using Nutanix Clusters on AWS. Stay tuned for more posts and info on Nutanix Clusters on AWS and other products/technologies. Follow me on Twitter.


 Twitter
 LinkedIn
 Youtube
 RSS
RSS